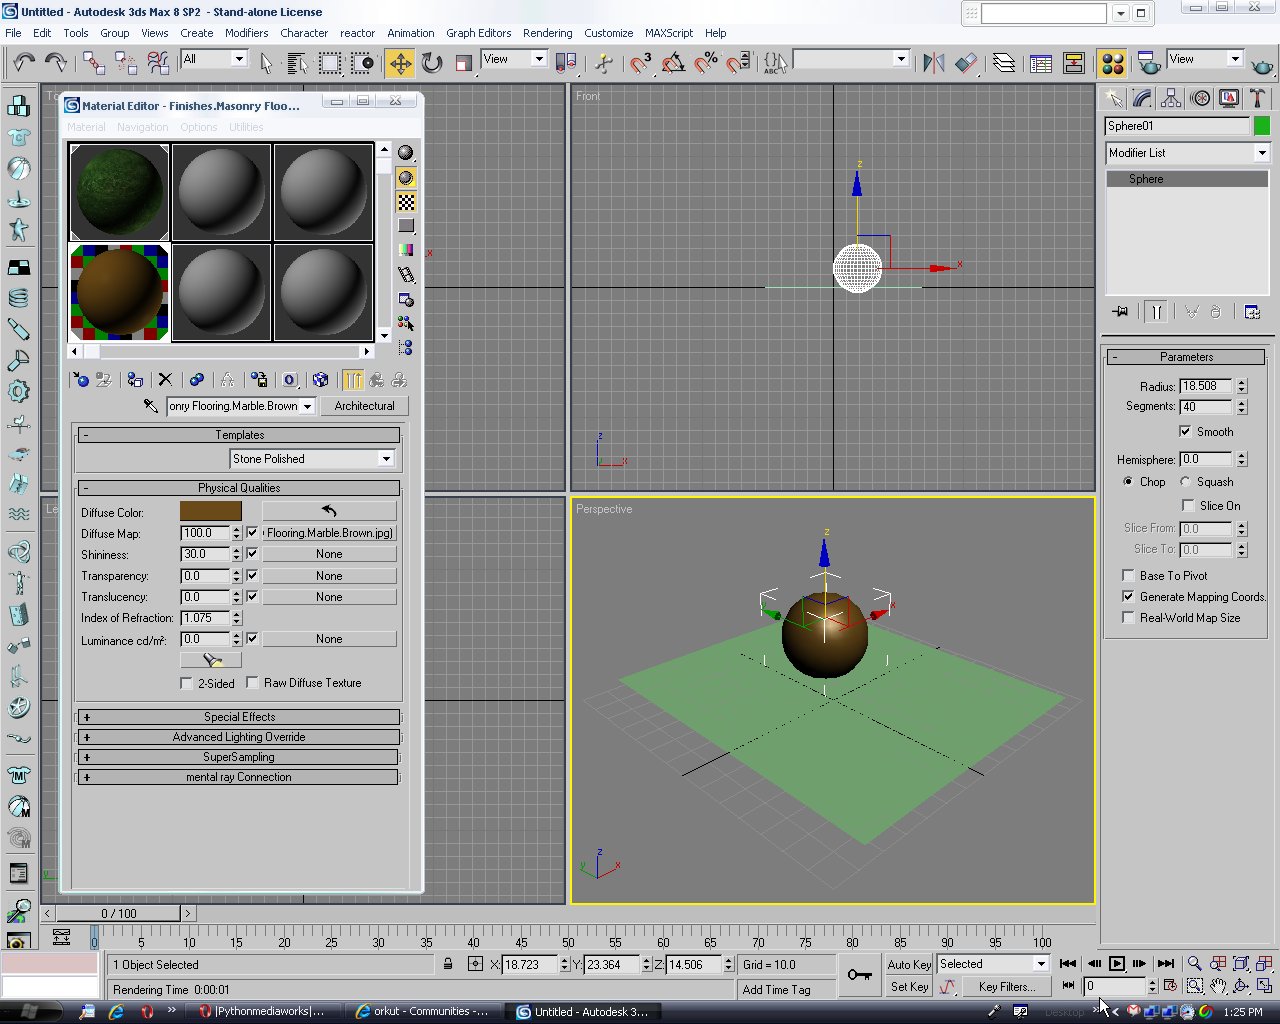
First we type a text in 3d studio max like uzair. In text uzair u is written separately z is written separately a is written separately I is written separately and z is also written separately. Then we set a target camera from the front as we see in the picture
In this Basix tutorial we will discuss in an informal manner everything you need to know about the essential operators and workflow within Particle Flow. We will learn what each setting does inside the basic operators, and create a small mortar explosion, precisely controlled with various methods, as well as completely procedural.
In this beginner’s tutorial we’re going to create a bokeh effect in 3ds Max. The term bokeh is familiar from photography. When depth of field is shallow, part of the photo is blurred. Bokeh refers to that blur or the quality of it. There are a few different methods of creating shallow depth of field in 3ds Max, but this time we concentrate on the ‘Depth of Field / Bokeh’ camera shader which is a new feature in 3ds Max 2011. The Bokeh shader gives us nice tools to control the quality and the look of the out of focus areas.
You may have seen this effect many movies and I can remind Blade or IronMan. Actually this is different from “Ashing” effect, but I couldn’t find any other suitable name. If you have a name for this effect please suggest.
Ok well thank you to anyone reading this tutorial. It proves you think I might actually have some skill hah. Ok first of all I’m terribly sorry if the outcome is shit, I’m creating the sig as I write this. While following this tutorial be sure to try out your own blending styles and options because yours may be too bright or dark compared to mine.