Main menu
You are here
layout designing tutorial using photoshop
Layout Designing tutorial using Adobe photoshop
Today I’m going to teach you how to make a layout using ( Adobe Photoshop ) and in the next tutorials ,we will convert it to (xhtml + css ) (coding) using any code editor you like .
This is the tutorial about coding this layout :- click here
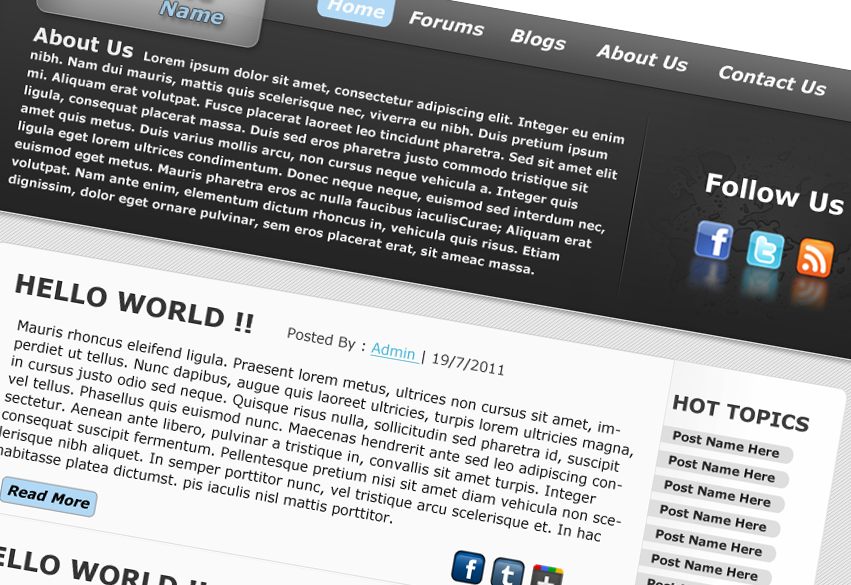
Layout Designing tutorial using Adobe photoshop
Notes :-
1- You can download the PSD file from attachments. ( you have to be registered to GROOK network to see them )
2- We will design the layout in this tutorial using photoshop , and in the next tutorial we will convert it to Xhtml + css.
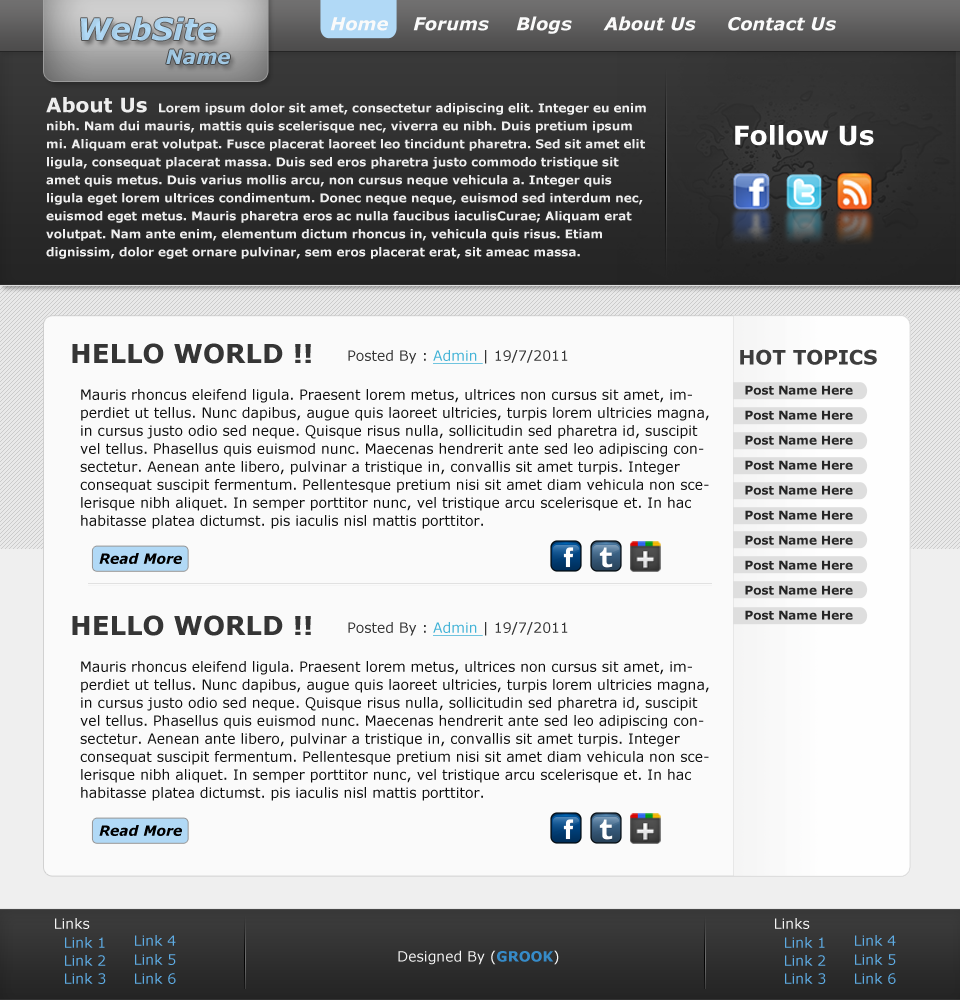
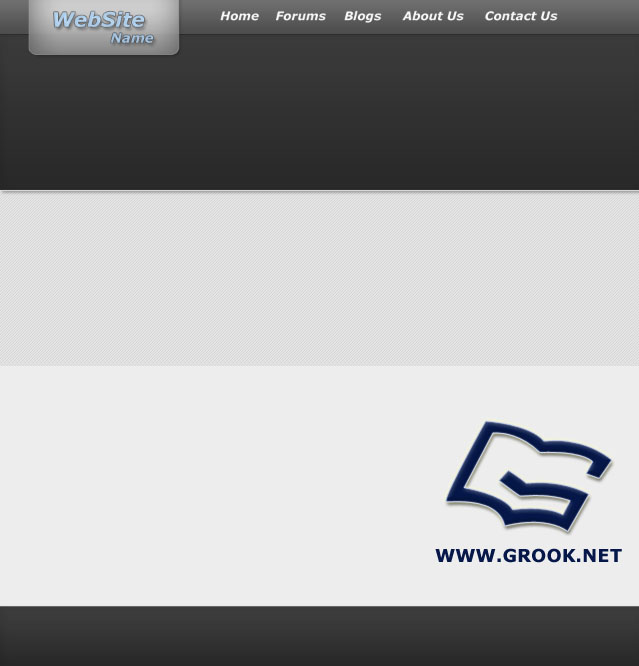
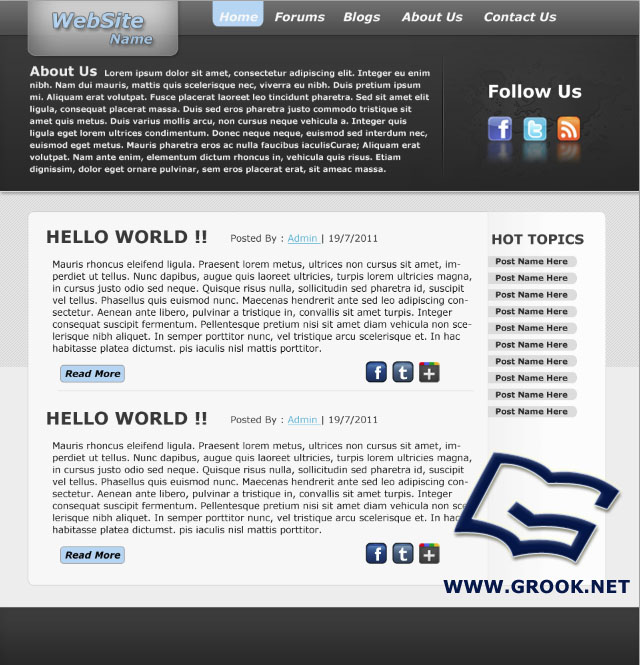
This is the layout which we will design in this course :-

So , let’s start :
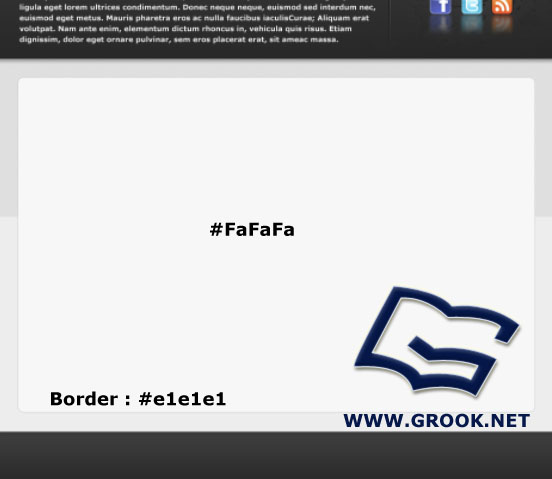
1- Make a new file with these dimensions ( 960px X 900px) and fill it with this color (#efefef)
2- make a new layer and use the (rectangle tool) to draw a similar shapes


And then go to styles of this layer , and make like this:-
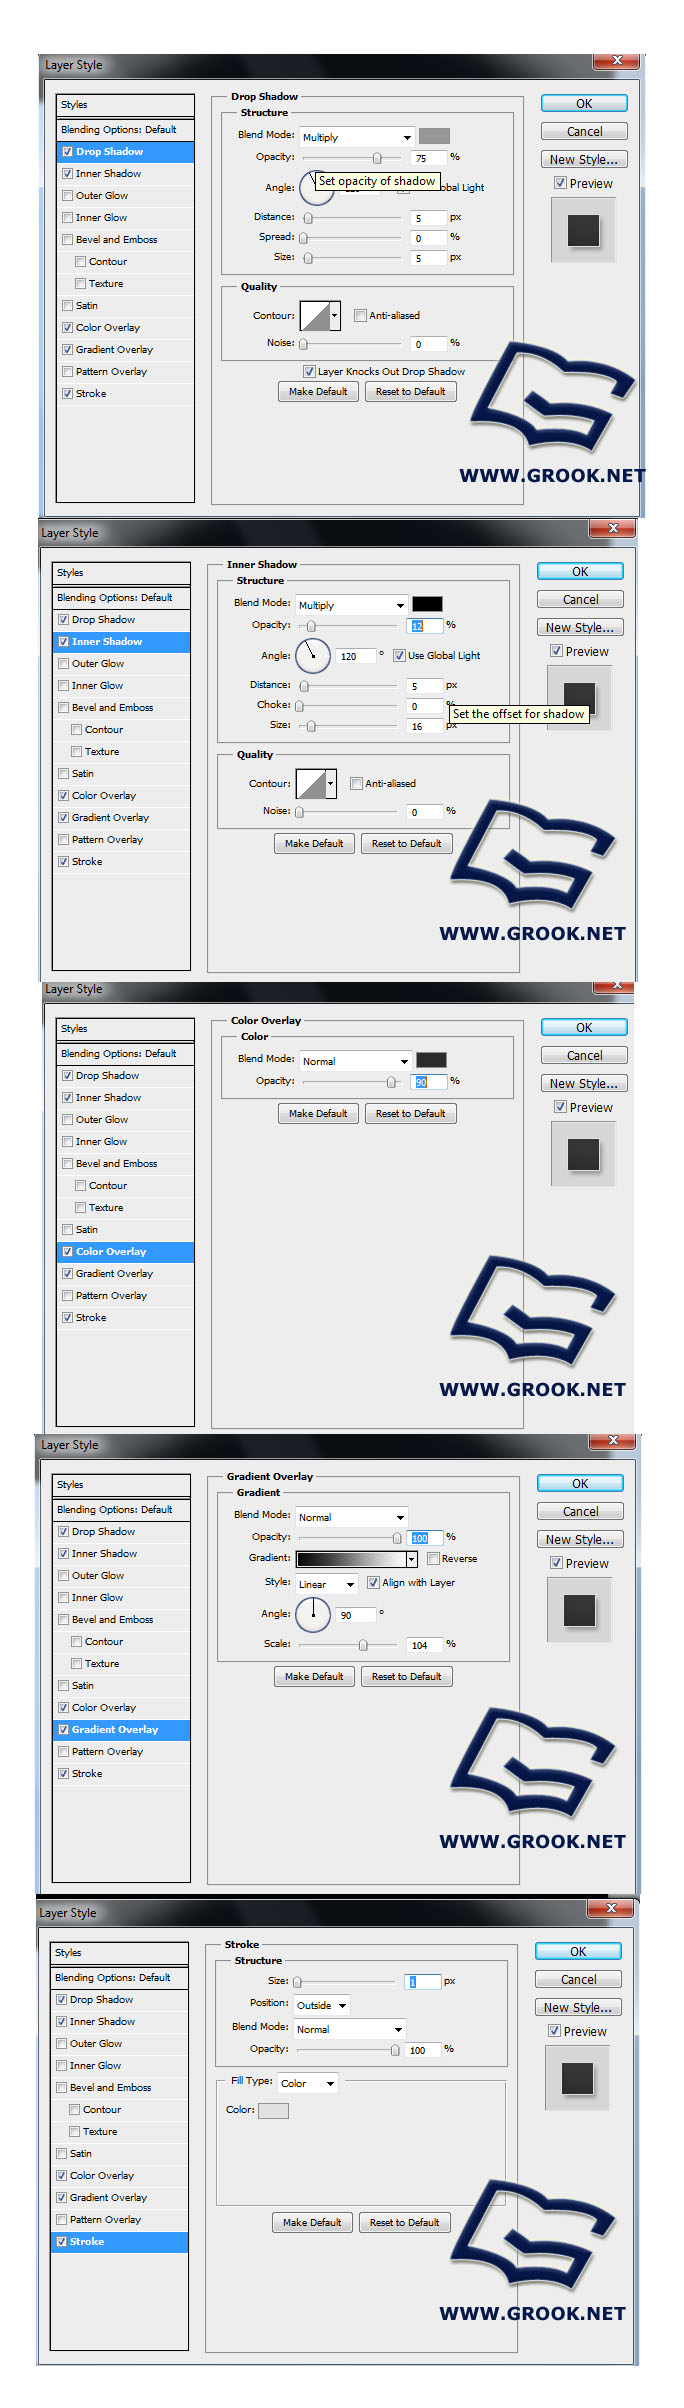
3- now , use the rectangle tool to draw a such shape (which has a red color) , and style it like the pictures below :-
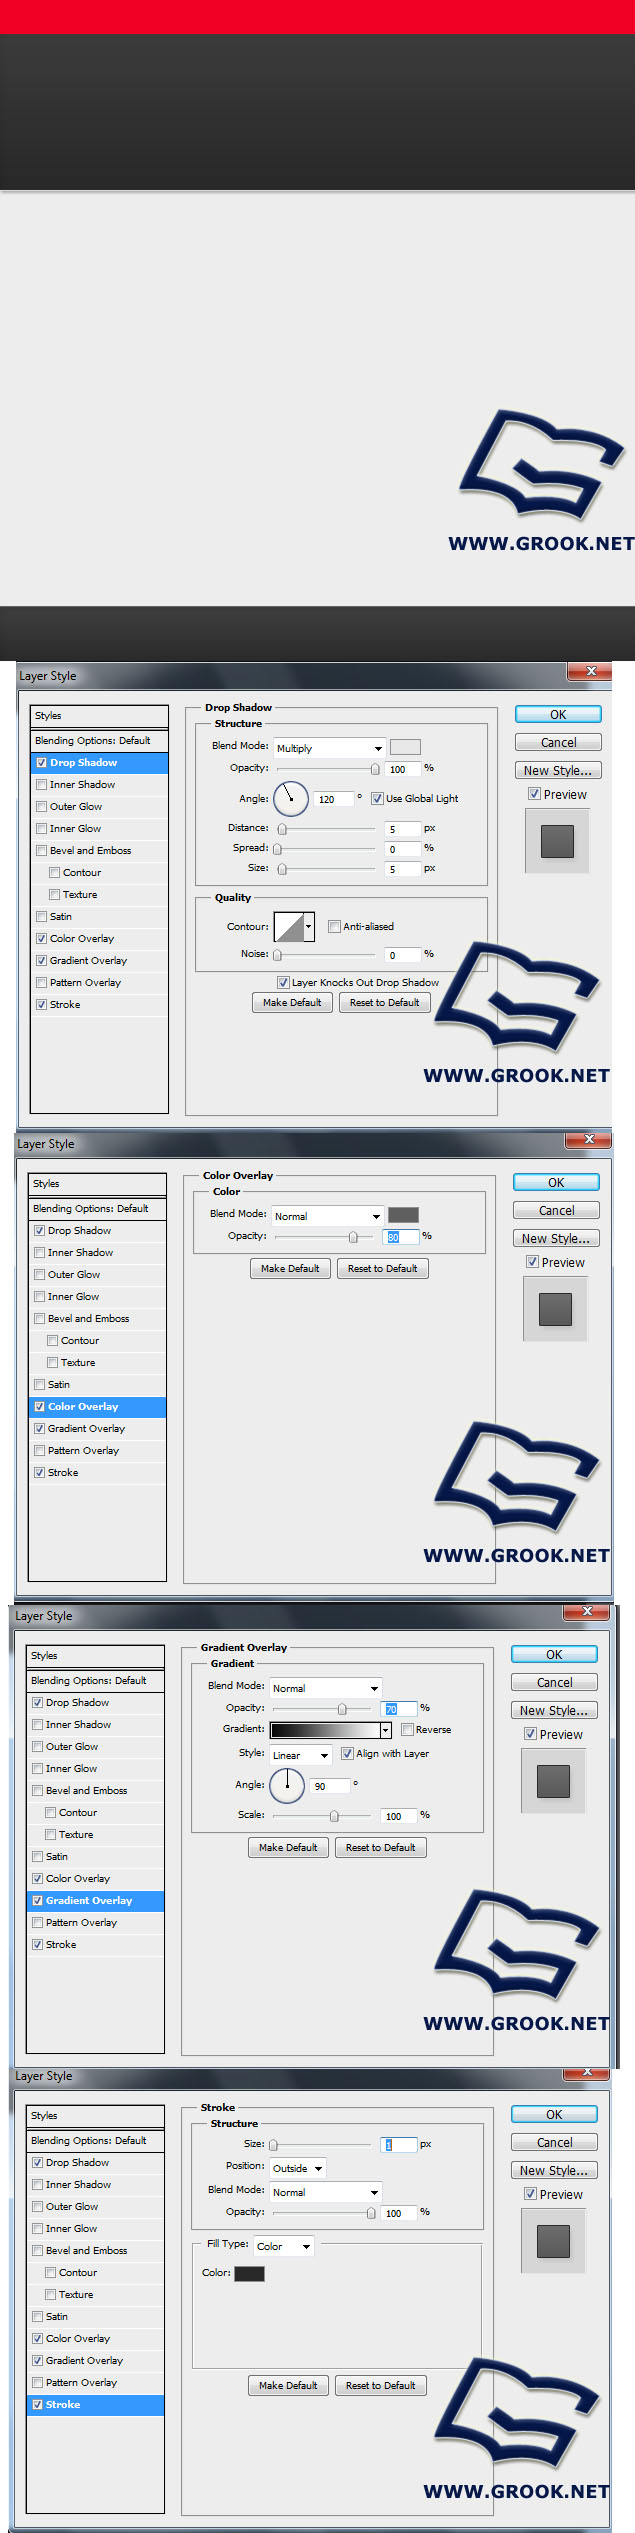

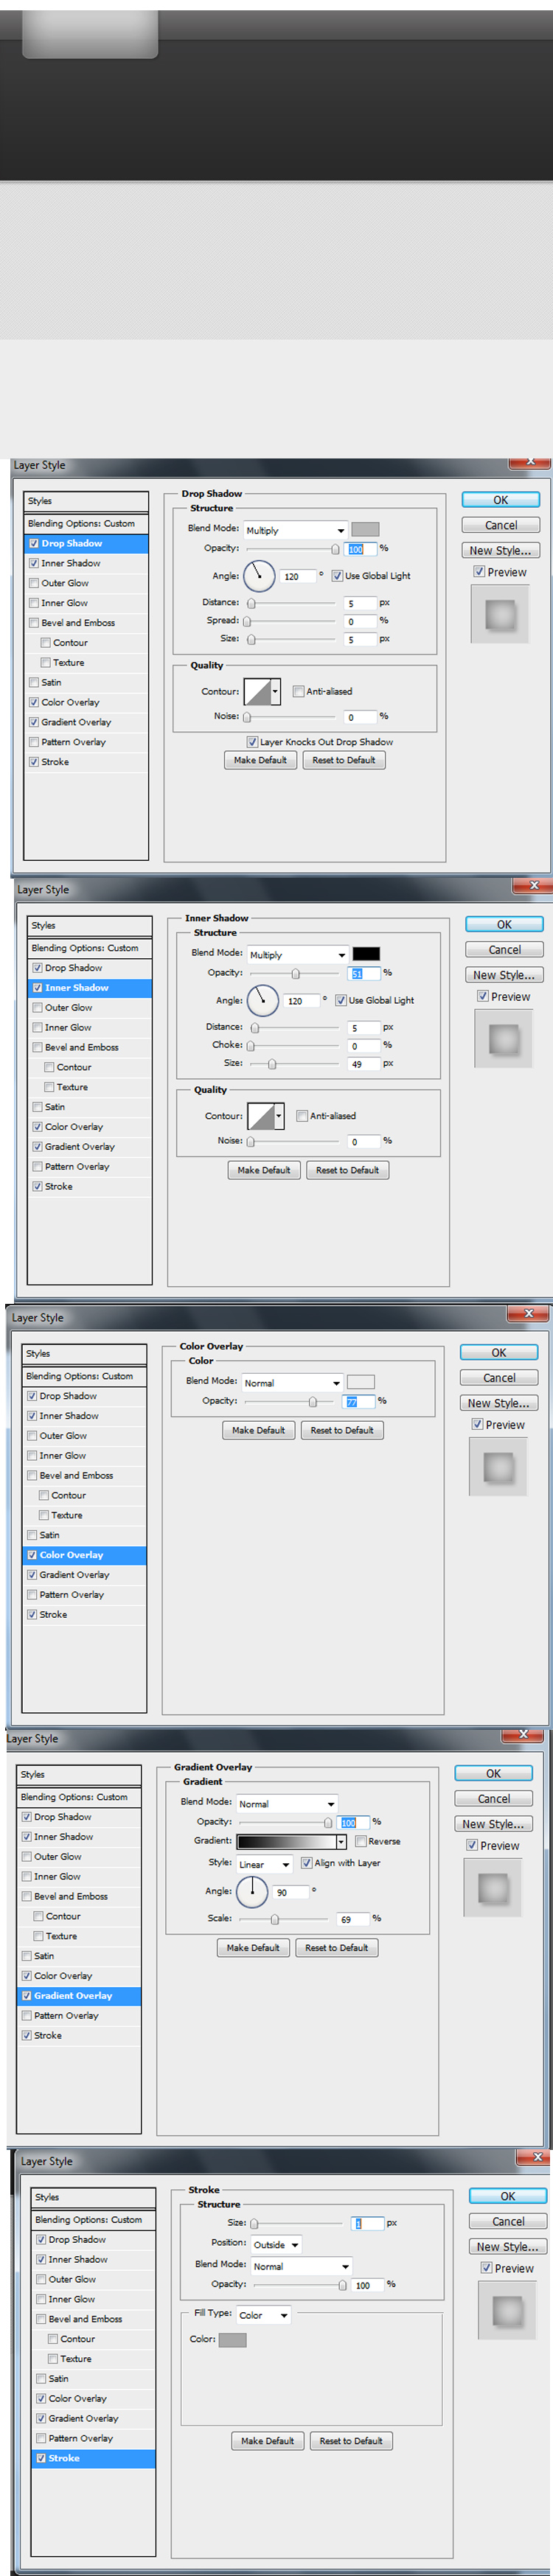
4- draw a shape like this , and style it like the photos :-
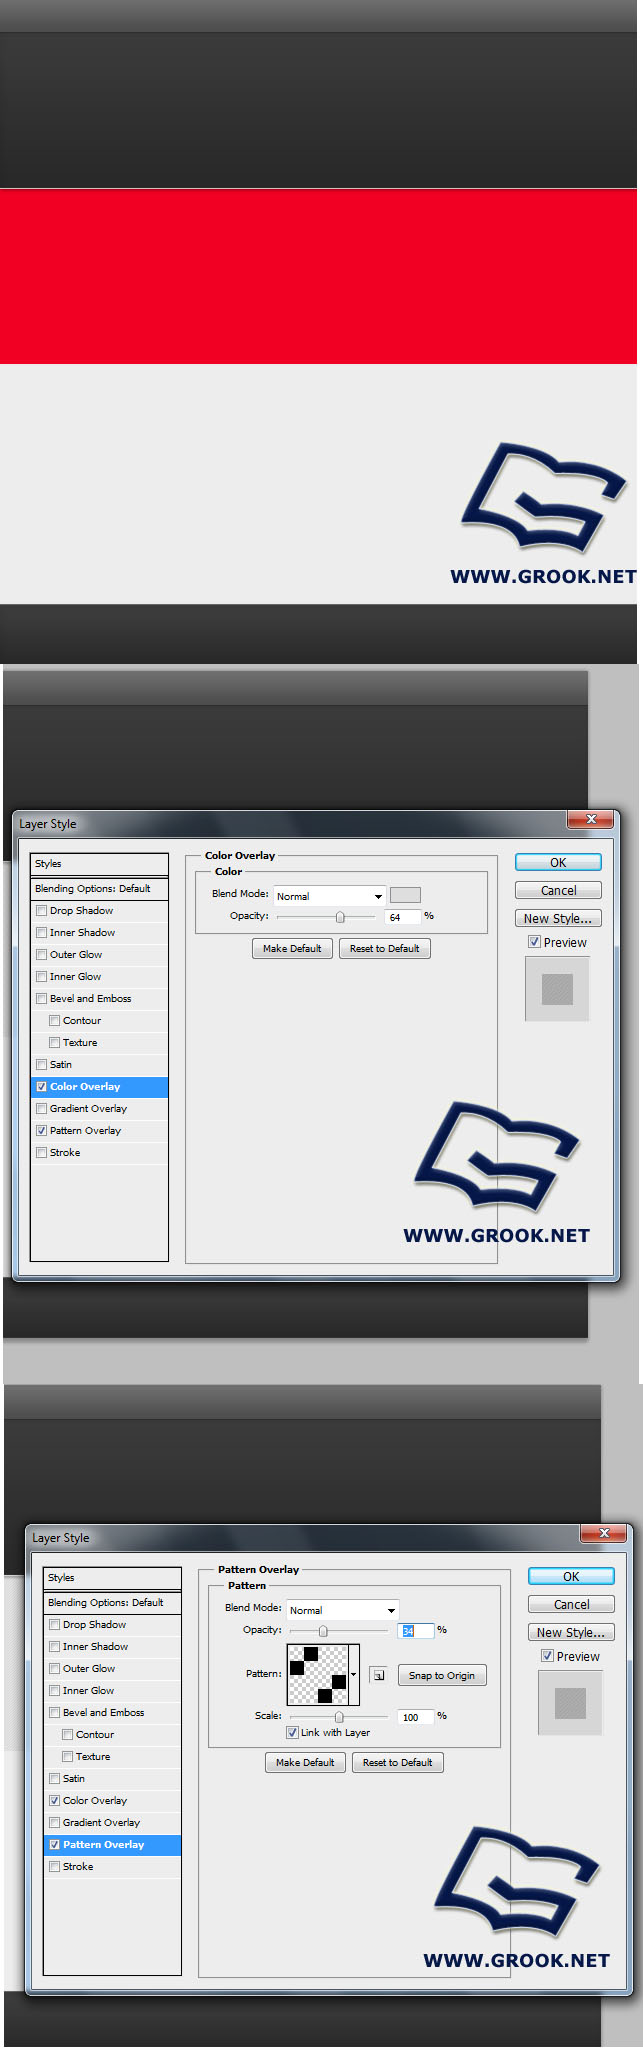

If you are wondering about the pattern , you can make it manually, it’s really easy.
Ok , so now we have finished the background of our layout , now we will make the logo and the navigation bar , let’s continue .
5- now , we will make the logo , so I drew a shape like this one below , using rounded rectangle tool , and set the opacity to 85% , and style it like the photos :-

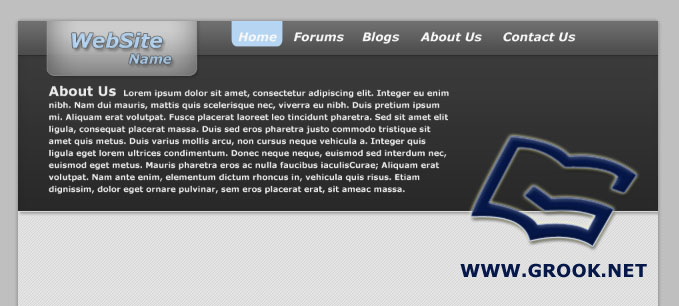
And now write the SiteName , and I added the nav-bar items , and I got this result :-

I used Vendrana as a font for the nav-bar.
And then added something like this under (Home)


6- I will finish the header area now , so I wrote anything in that area , and I put a picture , (you can download it from the attachments) and I also put the social icons , you can search google and download a lot of them.

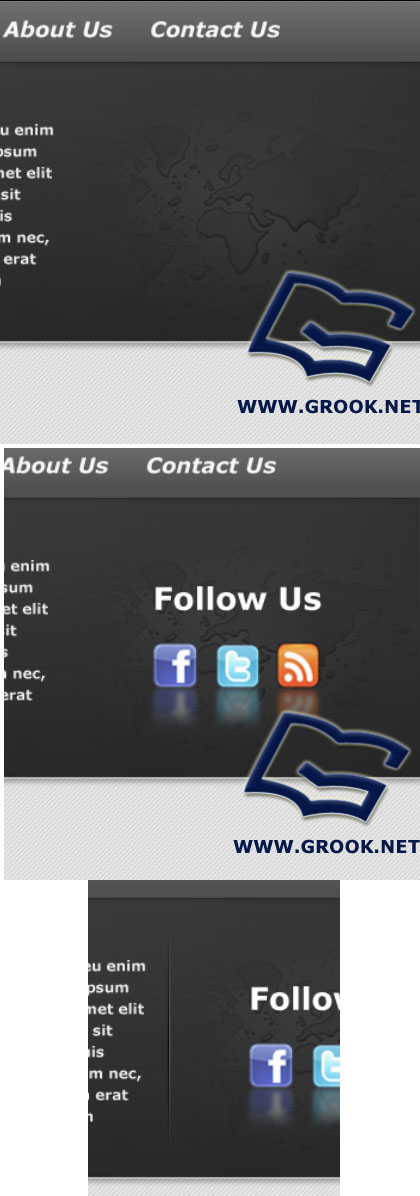
If you are wondering how did I make the divider (look at the last photo to see the vertical divider) , to make it I used the pencil tool and drew 2 lines , #111111 and #505050 , and I used the mask to make that gradient effect .
7- after finishing the header area , I’ll start with another one, I used rounded rectangle tool to draw a shape which will contain the sidebar and the posts , follow photos :-
To make that reflected social icons , i downloaded the icons ( you can download them from any icons website, google or from the psd below in the attachments) , and then i duplicated them , flipped them vertically , applied gaussin blur and used the mask to hide the last part.
And then I made a gradient on the right part , and wrote on it:
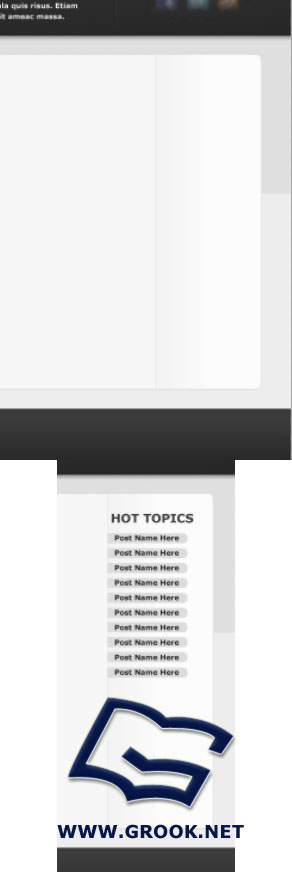

8- Very good until now , let’s add the posts , I wrote something like the photos below :-

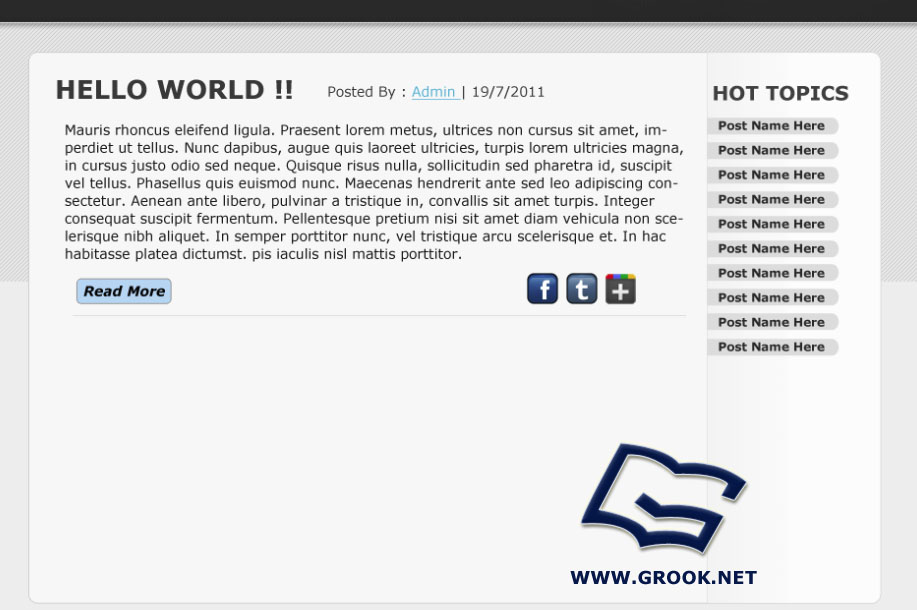
And then I duplicated the post 1 more time , so our website looks like this :-

You can download the icons , from any website , or you can google them , or you can download the PSD file ( in the attachments )
9- Let’s move to the footer , I will try to make it simple , follow the picture :-
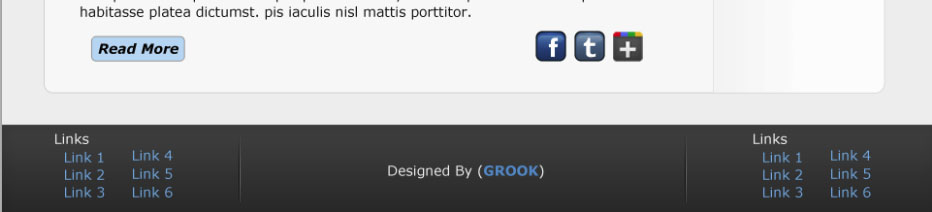
And this is the final result :-

Very good , now our website is ready to be divided and coded (converted to html + css)
See you guys in the next tutorials ,and if you have any question ,, just ask me.
Author : Ibrahim Kettaneh
| Attachment | Size |
|---|---|
| 443.05 KB | |
| 125.4 KB |
Copyright© 2010-2012 Grook network
sitemap | Privacy Policy
Follow us on: ![]()
![]()
![]()
![]()
